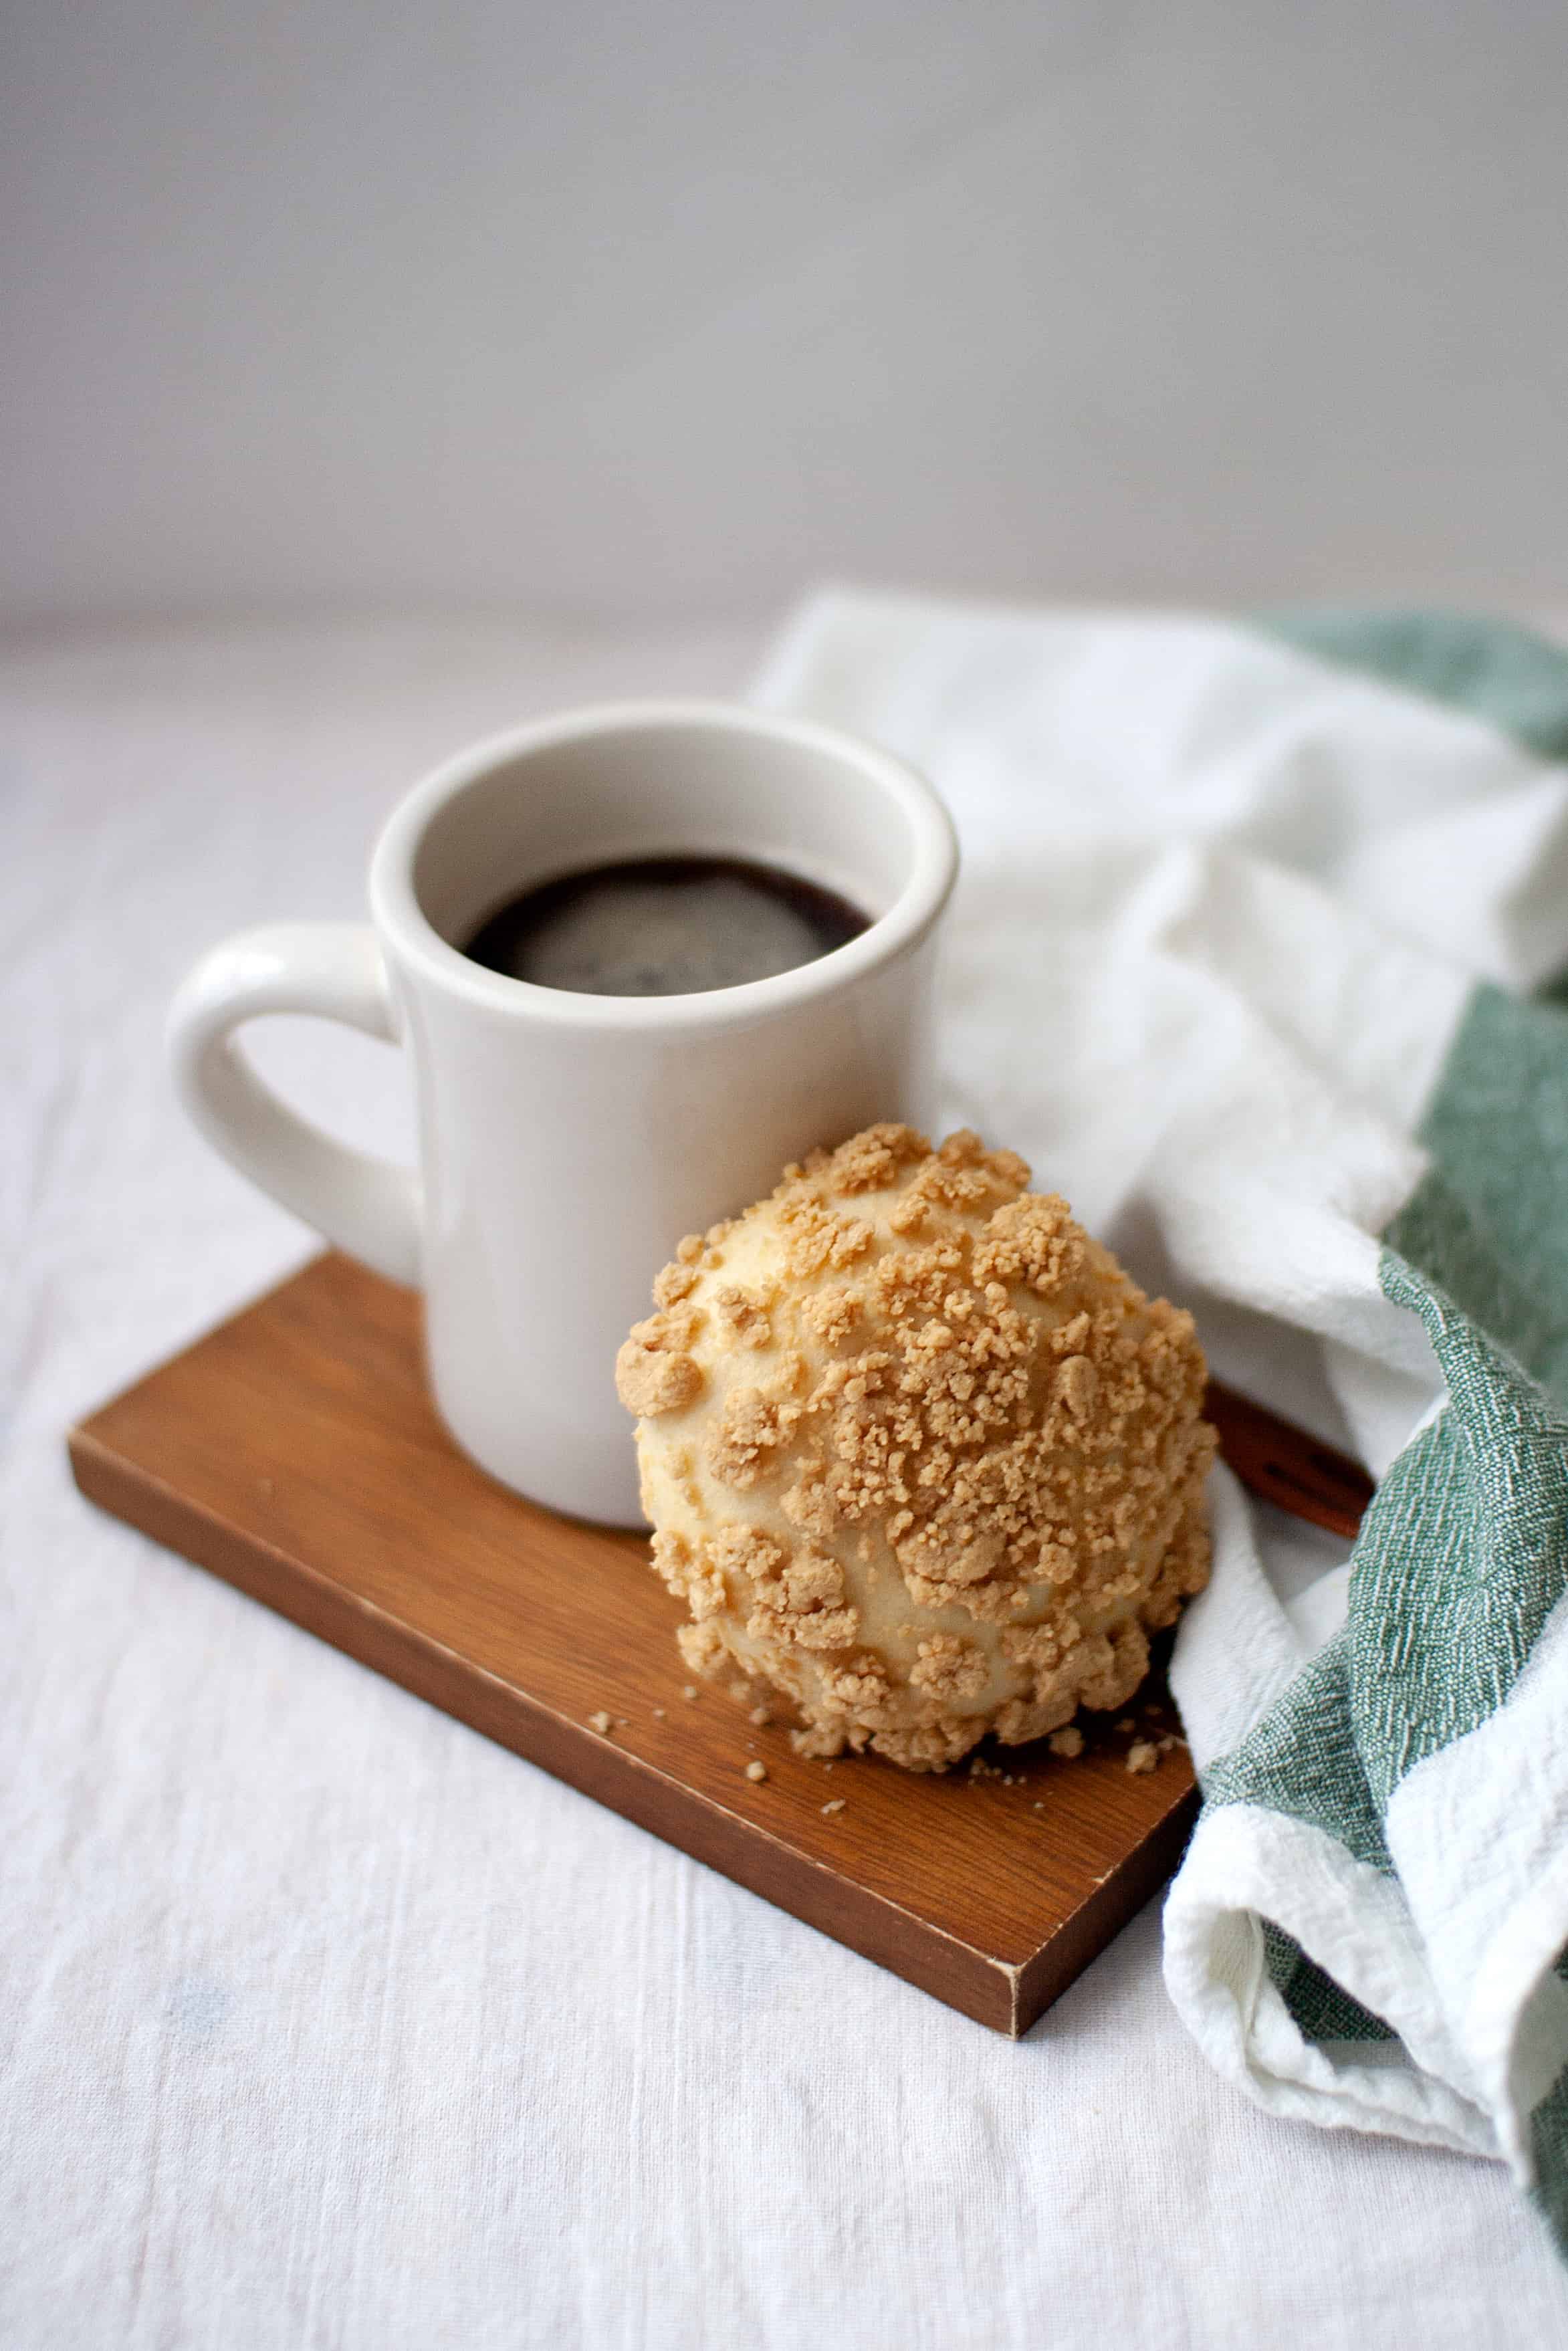
Have you ever been to a Korean bakery? On the surface, it may seem like a typical American or European shop, but instead of crusty loaves and salty crumbs, most of the shelves are filled with different variations of sweet and fluffy white bread. Bakeries are a huge part of the Korean food industry, but bread is not considered a staple food item, which is why the majority of their offerings are sweet and dessert-like. One of the most popular breads in Korea is soboro bread, 소보로빵, a soft, sweet bun topped with a crunchy peanut streusel. It also happens to be one of my favorites!
Bread came to Korea by way of Japan who was first exposed to it by Portuguese traders and missionaries in the 16th century–soboro bread is a great example of this layered food history. In Japanese, the word soboro, そぼろ, refers to minced meat/fish in soy sauce. The Japanese term is not native to its language, and has roots in the Portuguese words sabor, meaning flavor, and streusel, which looks similar to minced meat. Going even further, the word streusel originates from Germany, and refers to a topping made with sugar, butter, and flour. In Korea, soboro means streusel–it all comes full circle.
Soboro bread likely came from Japan’s melon bread, but the exact origins of both recipes are unclear. I also want to mention that Hong Kong’s pineapple bun has a similar resemblance and structure, especially to melon bread, but again that bread’s origin is unknown as well. Although we may never know how this bread + streusel combo came to be, what we do know is that over time, soboro bread has become one of Korea’s signature and most popular bakery items. But enough digging into history, let’s talk about the recipe!
I have to be honest, it took me several tries to get this recipe down. The hardest part was getting the soft crumb structure I was looking for. After multiple failed (aka dry) results, I finally dug deep into the internets and my Cooks Illustrated catalogs and learned about an ingenious bread-baking technique called tangzhong.
Tangzhong is a Japanese technique where a small portion of the flour and liquid in a recipe is cooked into a paste and then added to the dough. This allows the starches in the flour to absorb and retain more water, which results in a bread that’s fluffier, moister and one that stays fresh for longer. It’s also the key to making Japan’s famous (and deliciously soft) milk bread.

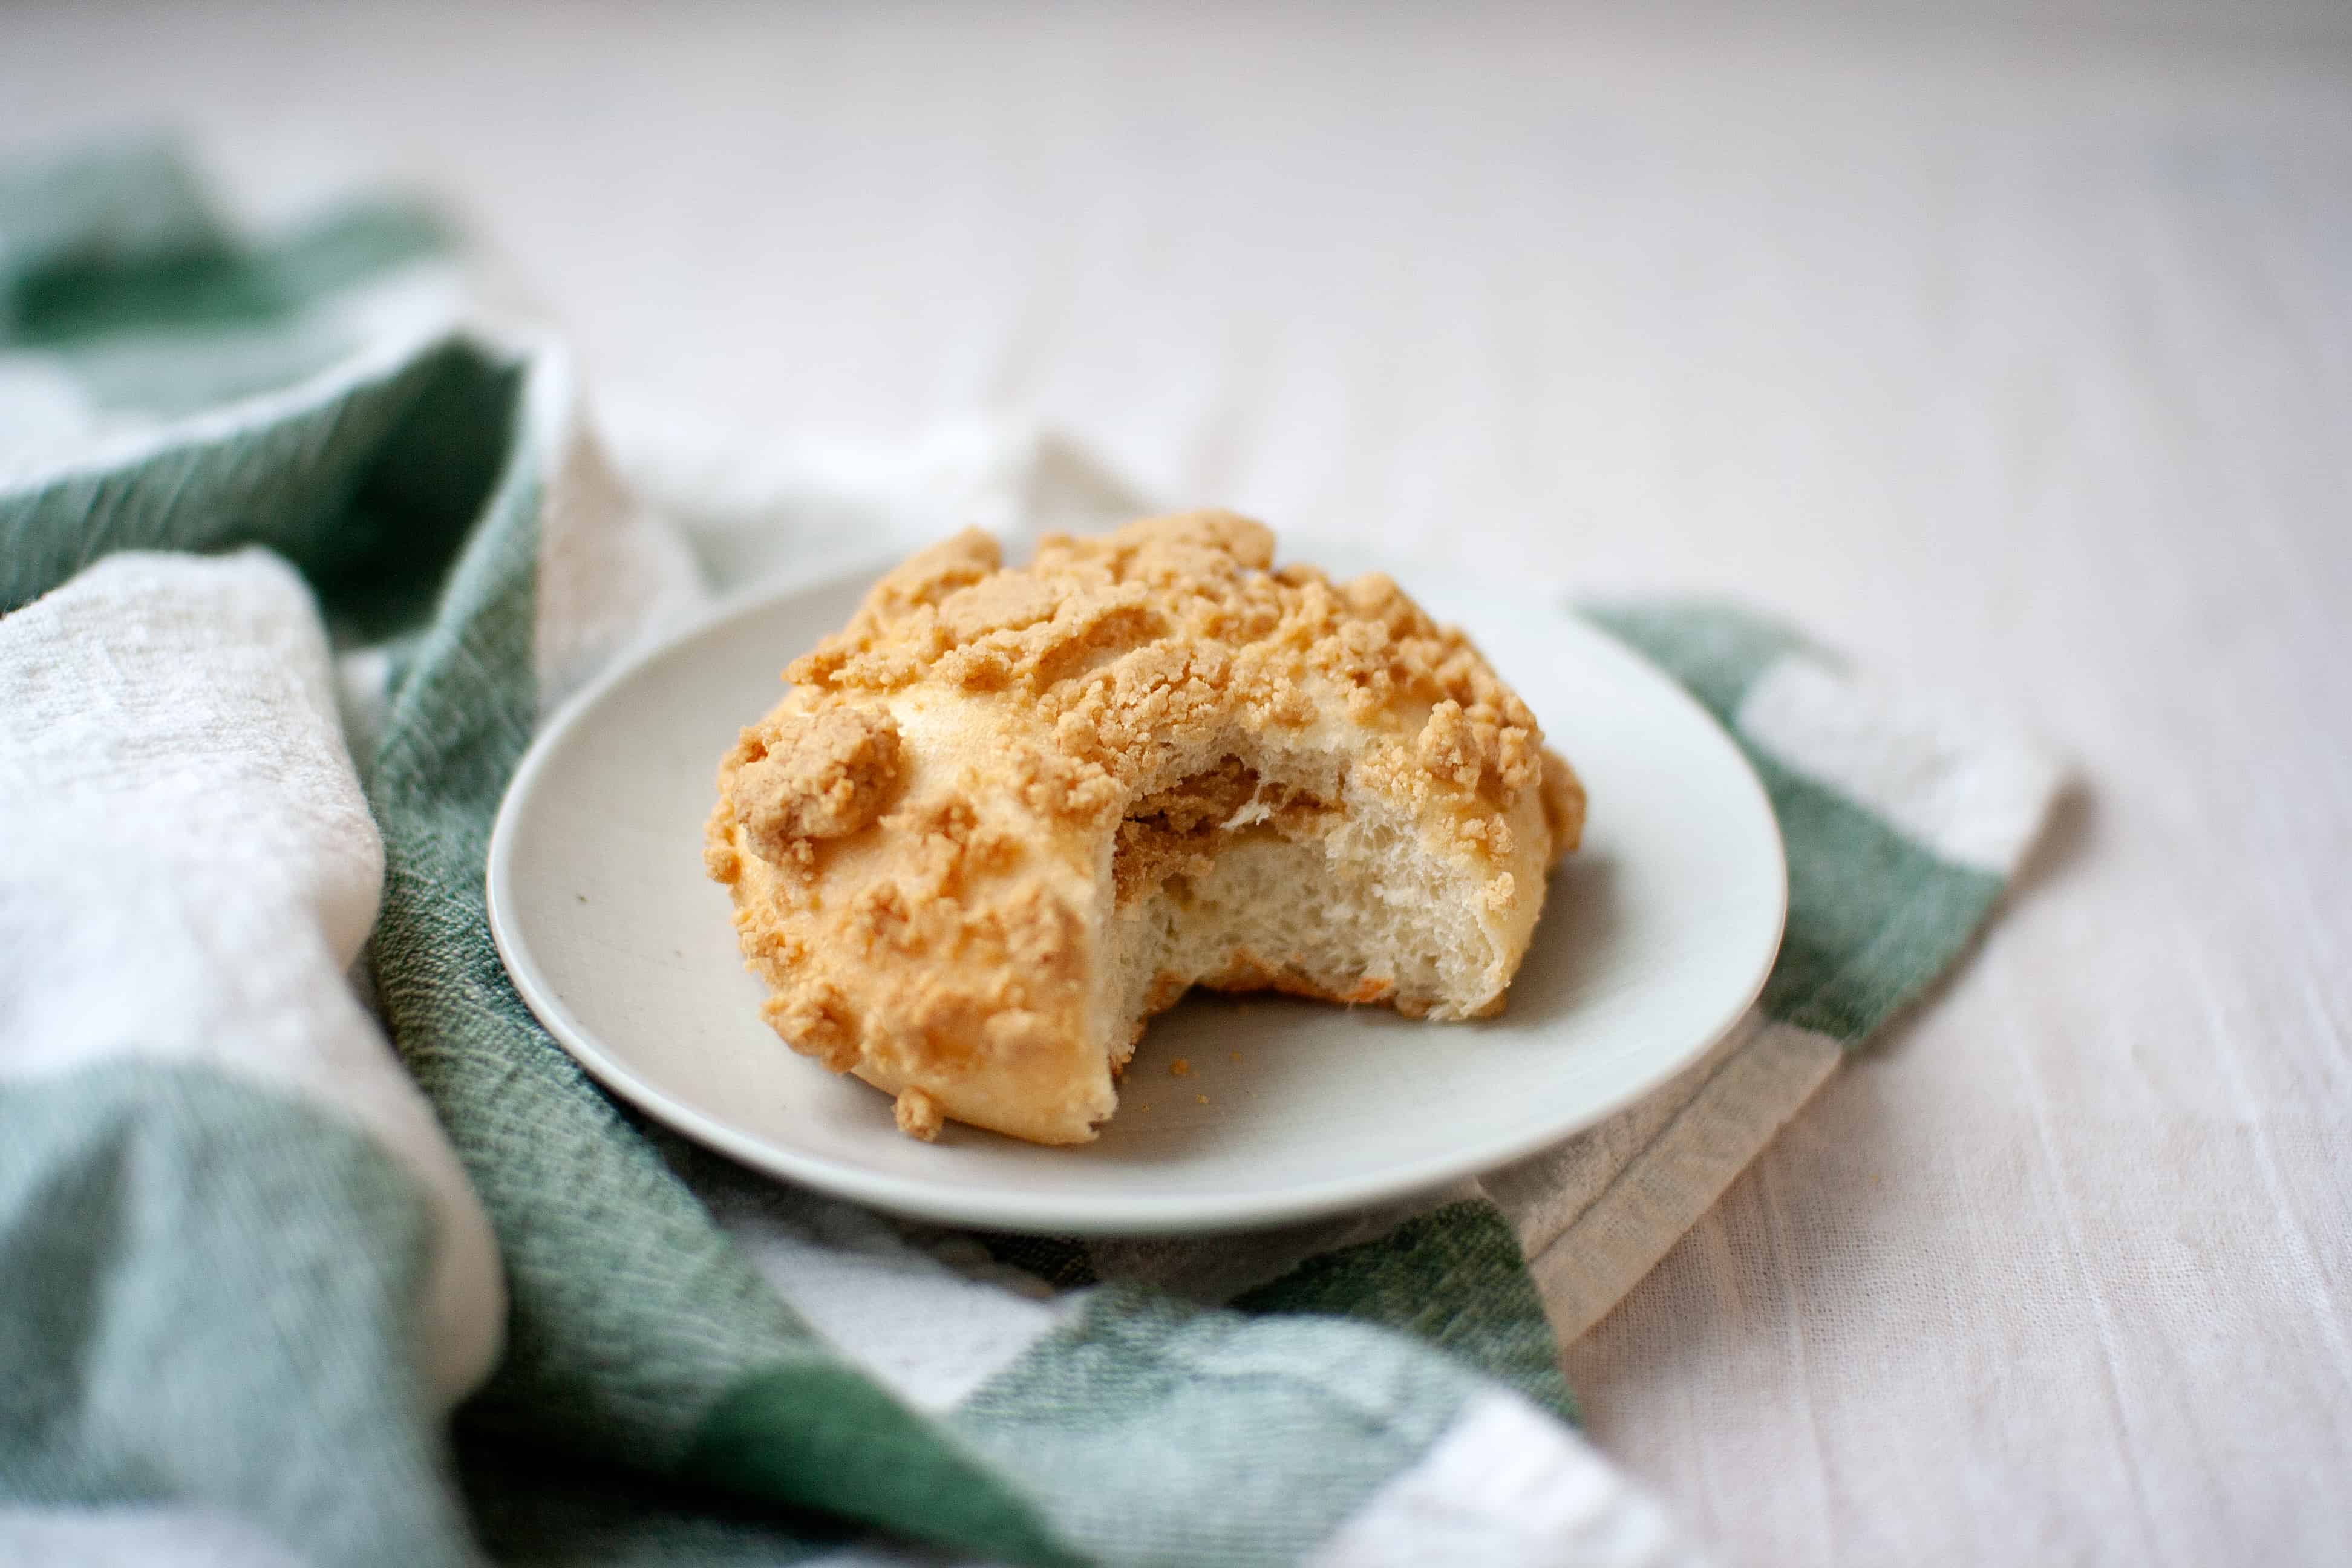
Soboro bread tastes like a Hawaiian sweet roll topped with your favorite peanut butter cookie. Even if you’ve never had it before, the flavors will taste familiar and the baking aromas will bring you back to the coziest memories of your favorite neighborhood bakery.
More sweet Korean recipes:
Sweet Korean Pancakes, Hotteok, 호떡
Korean Sweet Rice Dessert, Yaksik, 약식
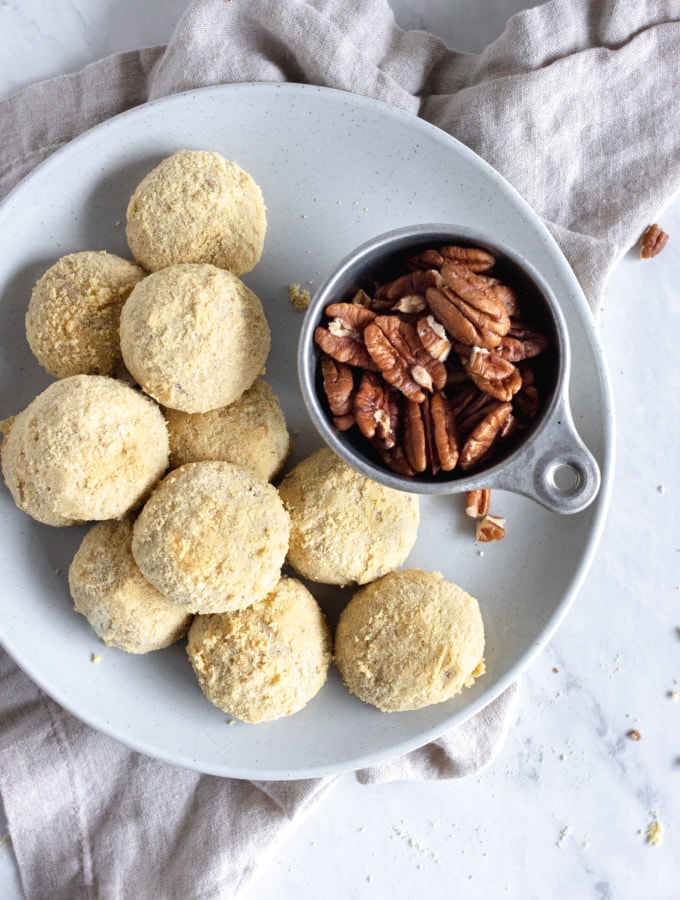
Soboro Bread, Korean Peanut Streusel Bread
- Total Time: 3.5 hours
- Yield: 12 pieces
- Category: Bread
- Method: Baking
- Cuisine: Korean
Description
Soboro bread, 소보로빵, is a sweet bun baked with a peanut streusel on top. It’s a popular item at Korean bakeries and is also referred to as gombo bread, 곰보빵.
Ingredients
Peanut Streusel
1/3 cup (76 g) butter, at room temperature
3 tablespoons (48 g) peanut butter
1/3 cup plus 1 tablespoon (90 g) brown sugar
1 large egg yolk
1 teaspoon (4 g) vanilla extract
1 1/8 cup (140 g) all purpose flour
1/2 teaspoon (3 g) baking powder
1 tablespoon (8 g) cornstarch
Flour Paste/Tangzhong
1/3 cup plus 1 teaspoon (80 g) water
2 tablespoons (16 g) bread flour
Dough
1/3 cup plus 1 teaspoon (85 g) warm milk*
1 large egg
2 cups minus 2 tablespoons (238 g) bread flour
3 tablespoons (36 g) sugar
3/4 teaspoon (3.8 g) salt
1 1/2 teaspoons (6 g) active dry yeast
2 tablespoons (28 g) butter, at room temperature
Instructions
Peanut Streusel
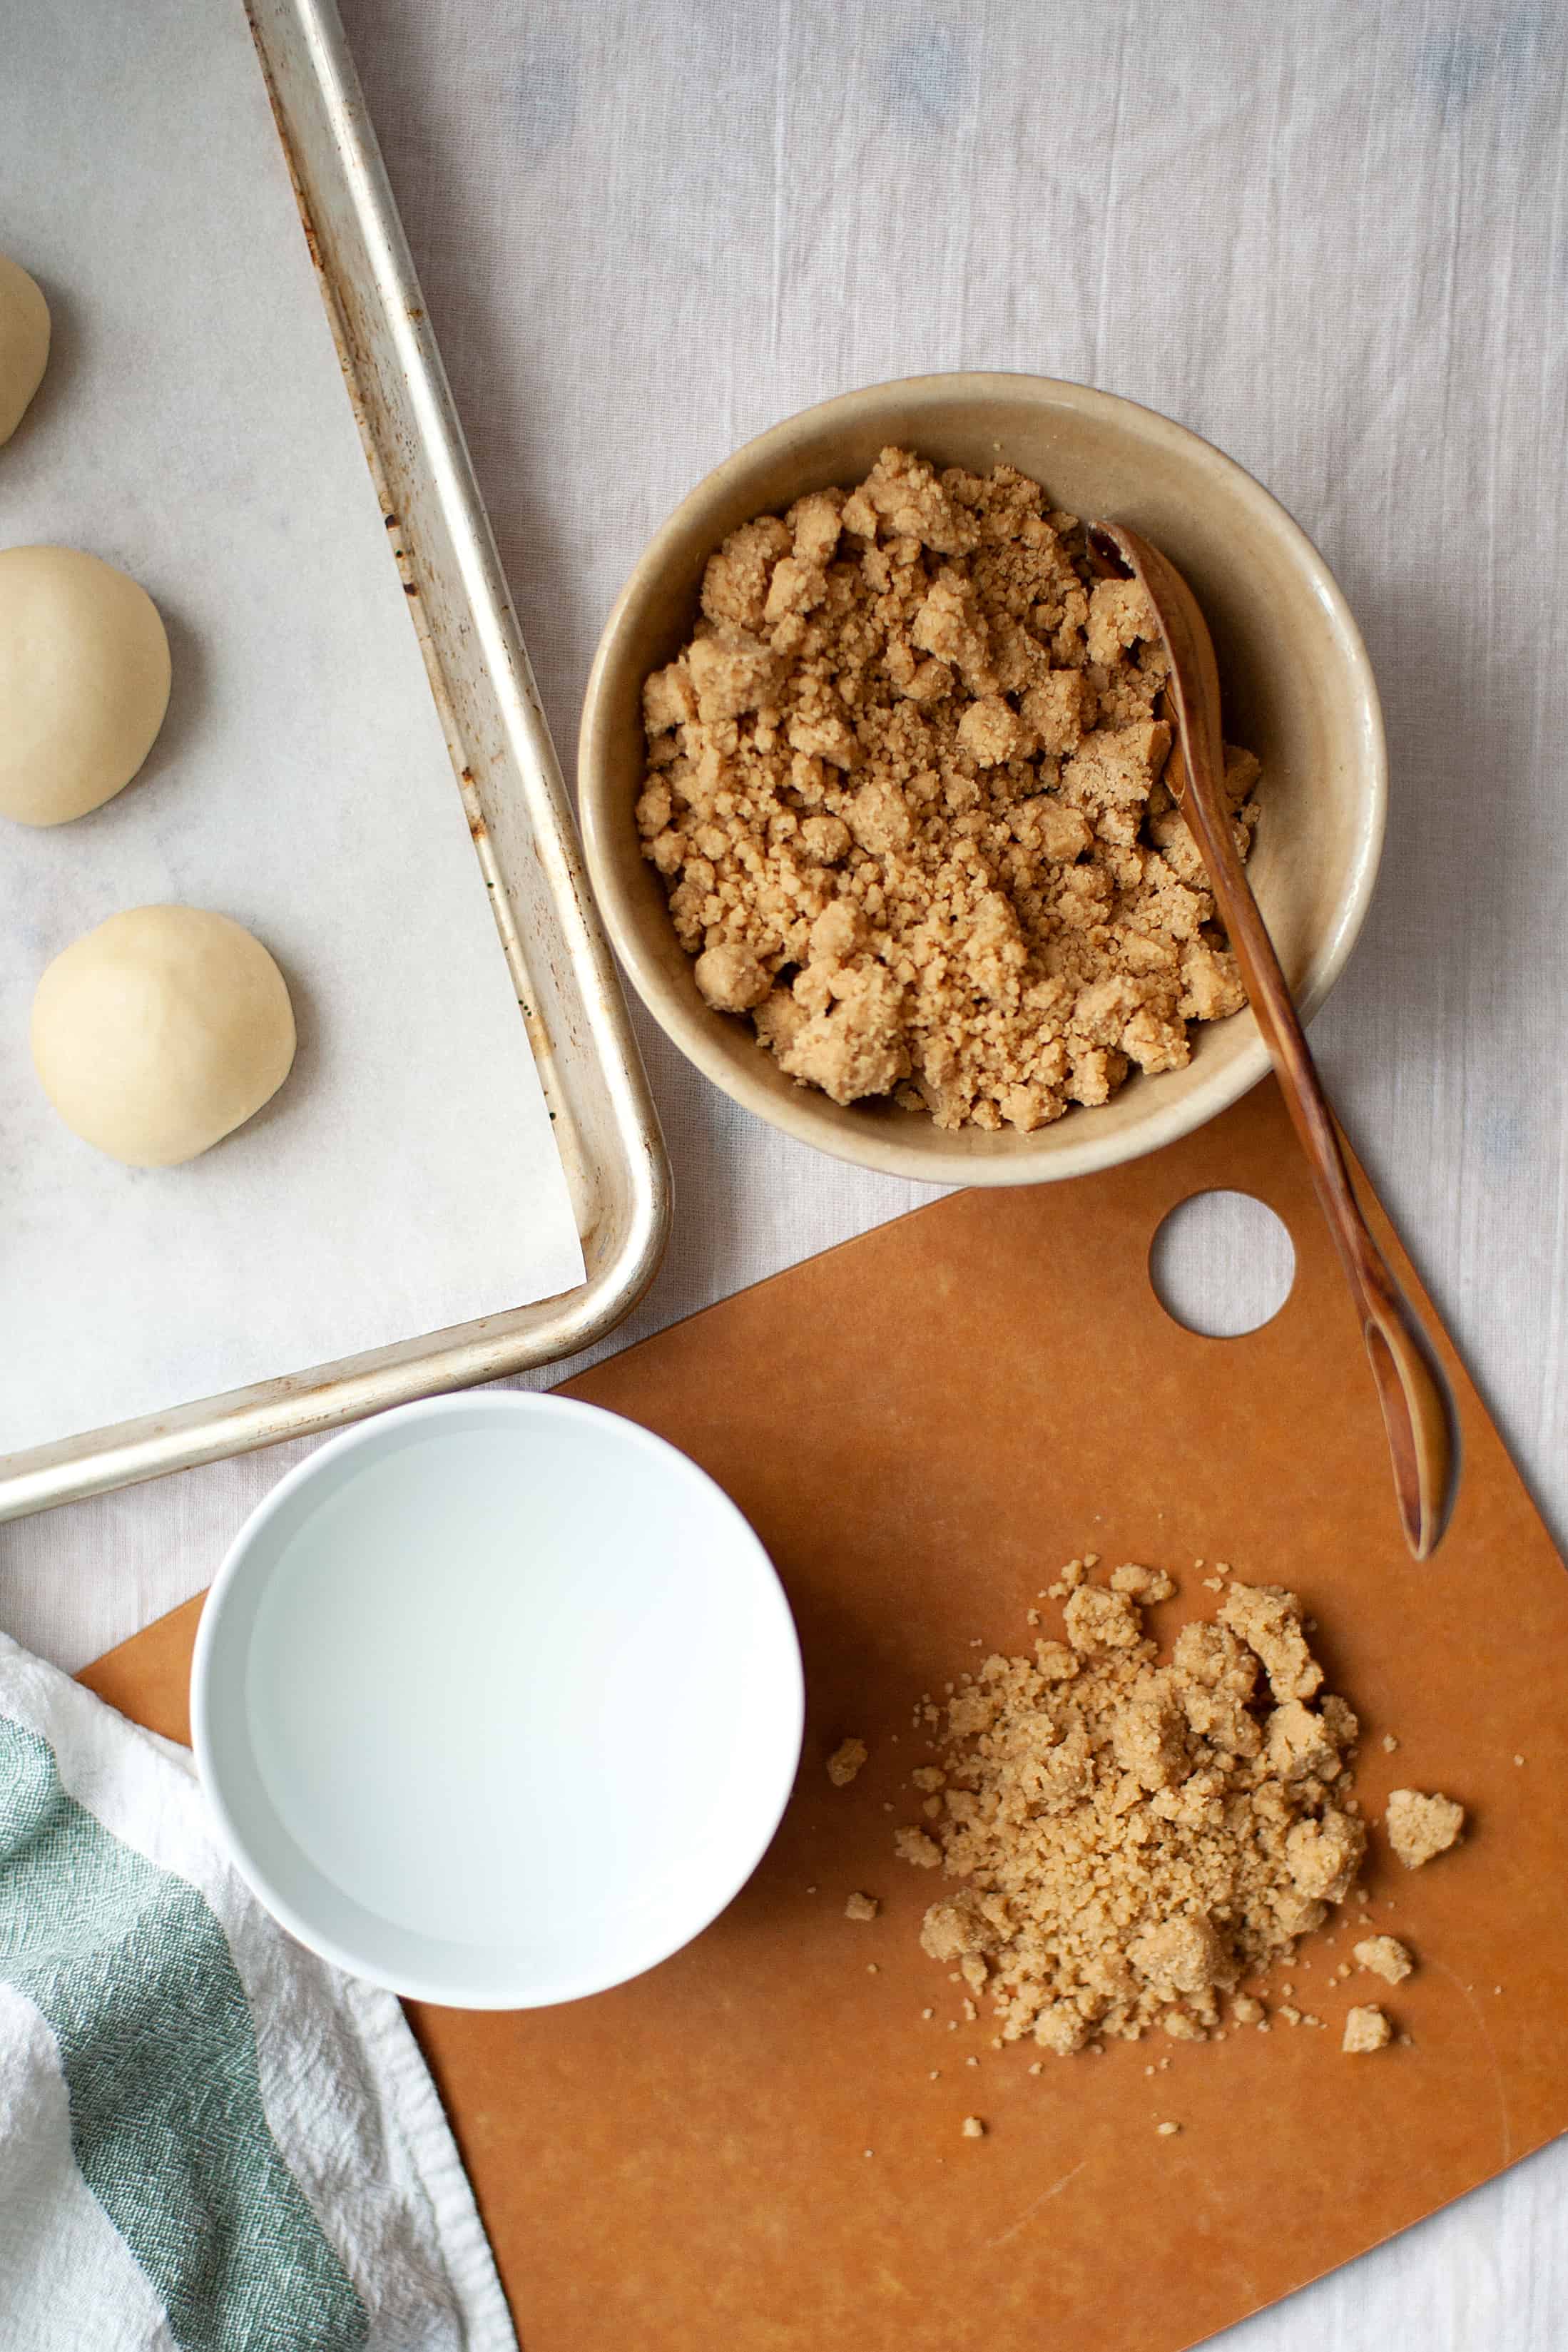
1. In a bowl, cream the butter and peanut butter until smooth. Add the sugar and mix until incorporated. Add the yolk and vanilla extract and combine. Add the all purpose flour, baking powder, and cornstarch and mix until a cohesive dough forms.
2. Break the dough apart into small crumbly, pieces. Cover and set aside at room temperature until needed.
Flour Paste/Tangzhong
1. In a microwave safe bowl, whisk the water and bread flour together until there are no lumps. Microwave at 20 second intervals, whisking inbetween, until the mixture is thick and smooth like a pudding.
Dough
1. In the bowl of a stand mixer, add the cooked flour paste/tangzhong and slowly whisk in the milk. Whisk in the egg and mix until smooth. Add the bread flour, sugar, salt, and yeast and mix with a spatula.
2. Once the dough roughly comes together, place the dough hook on the stand mixer and mix on medium low speed for 5 minutes.
3. Fold in the butter by hand. Once the butter is roughly incorporated, continue kneading with the dough hook on medium low for 5 minutes.
4. Flour your hands and form the dough into a ball. Transfer to a bowl that’s been lightly greased with oil. Cover and place is a warm place. Let rise for 40 minutes to 1 hour and 15 minutes or until doubled in size. To test if it’s ready, flour your index finger and press into the dough, like you’re poking someone. If the dough springs back, let it rise for a little longer. If the indentation remains, the dough is ready.
5. Line two baking sheets with parchment paper.
6. Once the dough has doubled in size, divide the dough into 12 equal pieces (around 40 g each in weight). Shape each piece into a smooth round. If the dough feels too sticky, generously flour your hands. Let rest for 10-15 minutes.
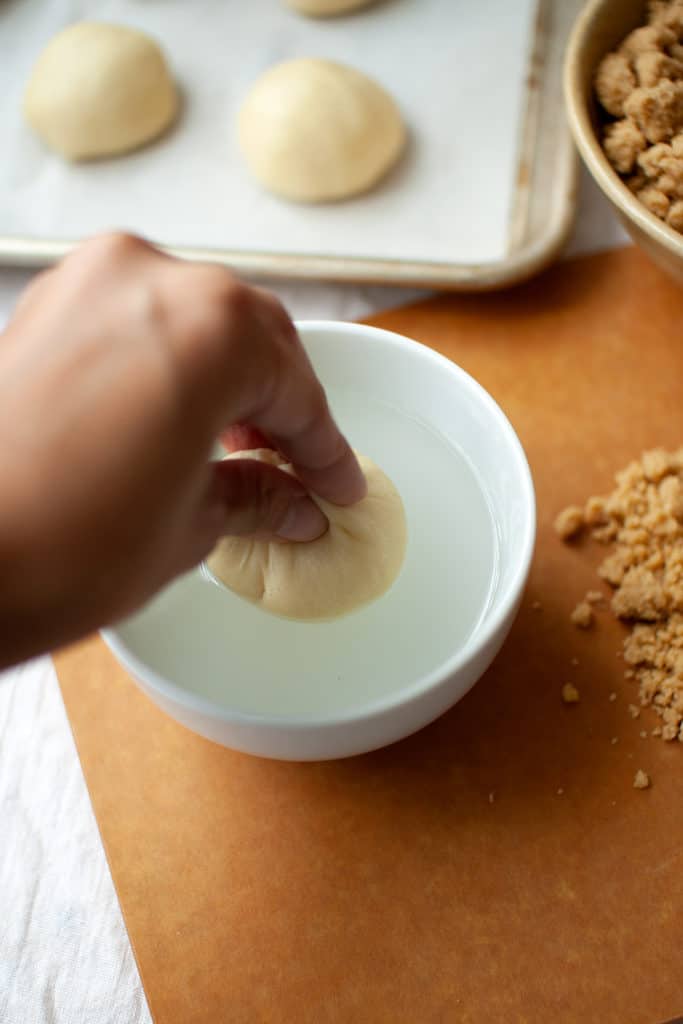
7. Meanwhile mix 1 cup water with 1 teaspoon cornstarch.*
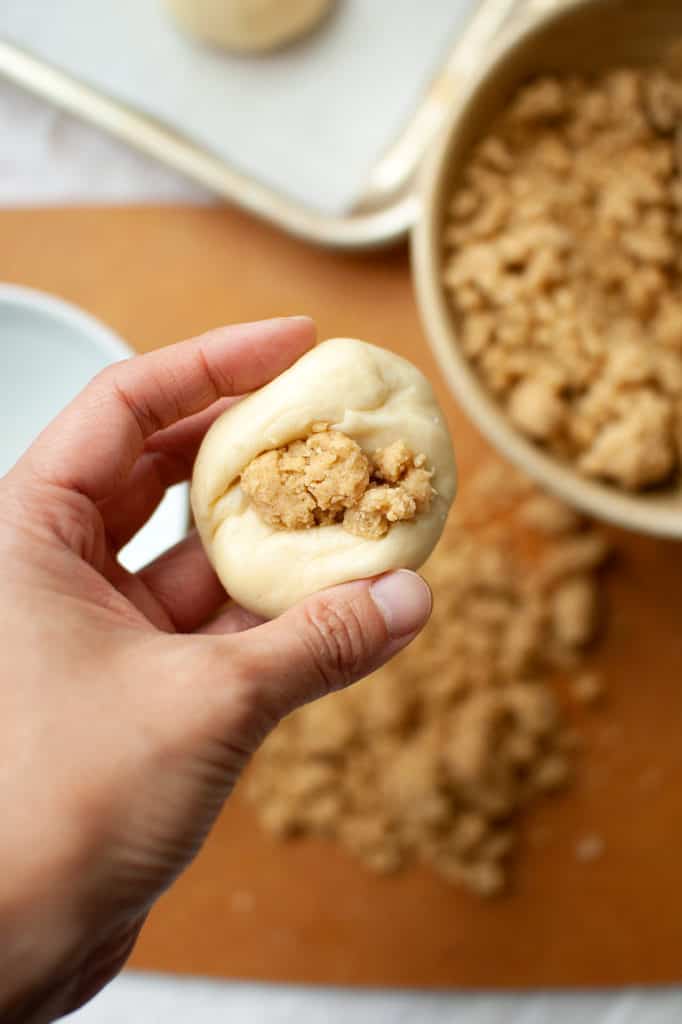
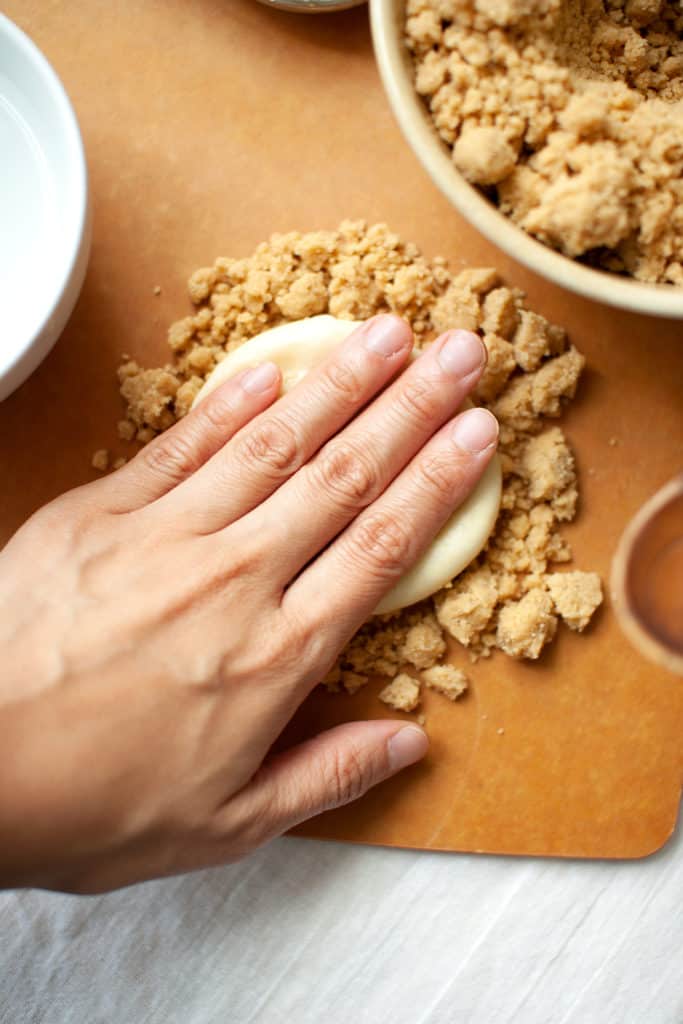
8. Generously flour your hands. Get one piece of dough and stuff with a heaping teaspoonful of peanut streusel.* Pinch the sides of the dough to seal. Repeat until all the dough pieces are filled.
9. Dip the smooth side of the dough into the water-cornstarch. Scoop two heaping tablespoons of peanut streusel on the countertop and press the wet part of the dough into the streusal. Make sure to stick as much of the streusel onto the dough as possible. Repeat with the rest of the dough.
9. Place six pieces of dough on each baking sheet. Carefully reshape each dough into a circle if needed. Loosely cover with plastic wrap and let rise in a warm place for 40 minutes to 1 hour.
10. Preheat oven to 375 degrees or 190 degrees C.
11. Bake for 13-15 minutes, rotating sheets halfway through baking, or until lightly golden. Cool on a rack and enjoy warm or at room temperature. Store in an airtight container for up to 3 days.
Notes
The milk should feel warm but not hot (around 95-97 degrees F or 35-37 degrees C).
The water-cornstarch mixture will help the peanut streusel stick to the dough.
Stuffing the streusel into the dough is not commonly done in Korea, but I think it’s a yummy addition 🙂
Keywords: soboro, bread, peanut, streusel, korean bakery, 소보로빵, 곰보빵

Cat says
Yum!! I want to try this at home. What if i don’t have a microwave? Can I do the tangzhong method over stovetop?
Jessica says
Cat- Definitely! Just slowly heat the flour and water, whisking the whole time to prevent burning.
Michelle says
Whoa. I had no idea there is so much history behind this bread.
I love Korean bakeries and can’t wait to carbo-load up when I’m in Korea this winter!
Jessica says
Michelle- I know right?! I can’t wait too!
Kristy says
On the recipe you state, 1 cup minus x, or 238g of flour, if you are using cup measurements this is actually closer to 2 cups. I was curious why it wasn’t coming together as I hadn’t paid attention to the grams measurements. Hopefully adding the extra a bit late will be okay 🙂 Thanks for the recipe!
Jessica says
Hi Kristy- Thanks so much for pointing that out to me! That was a typo on my mistake–it’s supposed to say 2 cups minus 2 tablespoons. I hope your Soboro bread still came out ok!
Mia says
Hi! I’m a 16 year old girl from SIngapore, living in New Zealand, and today I made Soboro bread! I just finished baking it and have already finished one bread! Haha, I should save some for tomorrows’ breakfast but it’s too tasty! Ahh, I love this, and thank you so much for this recipe. I was able to make this because the recipe is so beautifully written! This is the second time I’ve ever made bread and I’m excited to try more of your recipes!
★★★★★
Jessica says
Mia! I’m so glad you loved the recipe and that it turned out beautifully! It’s always lovely to connect with fellow third culture kids 🙂
Sindy says
I really want to try this but I don’t have a stand mixer. Is there a way to make this bread without a stand mixer?
Jessica says
Sandy- You can definitely make this without a stand mixer! It’ll just require a bit more elbow grease 😉.
Rachel Yoo says
you never said what to do with the peanut butter 😅 I mixed it in anyways
★★★★★
Jessica says
Rachel- So sorry about that! I just edited the recipe to make that part more clear. Thanks for pointing it out 🙂
Lilly says
WOW! Thank you so much for posting this. I just made this and IT TASTES AMAZING- tastes so authentic, just like the ones from Korea. I’m so happy I found your recipe. I will definitely be trying your other recipes!!!
★★★★★
Jessica says
Lilly- Thank you!! I’m so glad you found my site and liked the recipe!
Bec says
My kids are allergic to peanut butter; how can I make this streusel topping without peanut butter?
Thanks advance for you help!
Jessica says
Bec- Try substituting with a different nut or seed butter!
Alice says
Thank you so much for sharing this recipe! I made this for my family and they all loved it 🙂 the dough turned out so fluffy and soft. Will definitely be making this again!
Jessica says
Alice- Thanks for much for letting me know! This makes me so happy!
lois says
I’m so excited to try this! Thank you for sharing. I was wondering if I could substitute bread flour for all purpose or cake flour?
Jessica says
Lois- Thanks for stopping by my site! Bread flour has more protein so the end result could be a little more tough than using all purpose flour.
Hanna says
Does the yeast need to bloom/be proofed before being added?
Jessica says
Hanna- If you’re not sure whether your yeast is still alive or not, then I would go ahead and bloom it. However, if the yeast has not gone past its expiration date and has been stored in a cool place I wouldn’t worry too much about it being dead.
Amy says
Honestly the best and most successful recipe I have attempted. It tastes amazing!
★★★★★
Jessica says
Amy- Thank you!! That makes me so happy 🙂
Marisa says
Just tried one for the first time and super excited to give your recipe a go. I was hooked at the first bite! Before you divide the dough into 12 pieces after the proofing do you punch down the dough? Can’t wait to try these!
Jessica says
Marisa- Yay!! I’m so glad you got to try one for the first time! After dividing the dough into 12 pieces, no need to punch down.
Audi says
Hi, i make this recipe today, i wanna ask is the dough suppose to be sticky? And after the first fermentation my dough suddenly collapse is that suppose to happen?
Jessica says
Audi- The dough should be sticky, but it shouldn’t collapse after rising. This may mean that you’ve let the dough rest for too long. Remember that the times written in the recipe are guidelines. How long it takes for a dough to properly rise will depend on your specific environment (ex. if it’s hot where you live and inside your kitchen, the dough will rise a lot faster). It’s best to look at physical cues to determine readiness.
Brittany says
Do you use unsalted butter for this recipe?
Jessica says
Brittany- Yup! Unsalted butter.
Britt says
Is there a way to prevent the bottoms from burning? I’ve tried this recipe twice and both times the bottoms have burned badly while the tops remained underbaked.
Jessica says
Britt- Try stacking two baking sheets together to bake instead of using just one. This can help control the heat on the bottom. Another suggestion would be to place your rack in the top third of your oven. I hope that helps!
Britt says
Thank you so much for the advice to use two trays and bake them higher up in the oven! They came out absolutely perfectly!
★★★★★